Have you ever gone to a restaurant and thought, "Hmmm why can't I make stuff like this at home?"
That was precisely my thought process when I tasted this salad at one of my favorite swanky Italian restaurants in Chicago. It was pure joyful bliss in my mouth. Healthy, citrusy, nutty and all sorts of savory.
When I ordered it from the menu for the table (I do all the ordering when we go out because I am a food snob and I know what everyone needs to eat. That's just how I roll …) everyone stared at me and said, "Ehhh kale …yuck, Mila, it's soooo played out."
What they did not understand was that this was Tuscan kale -- the best kind of kale. The green, meatier and more delicious cousin of classic kale. Did you know that just one cup of kale has over two times the amount of Vitamin A you need in a single day? Yup, it is awesomely good for you and delicious.
"Trust me on this one … this stuff is fabulous and if you do not like it, I will happily eat all of it." They seemed to be satisfied with that answer and allowed me to finish ordering the 15 other items from the menu.
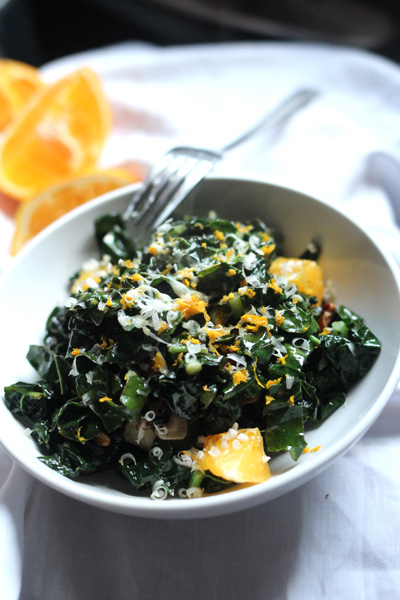
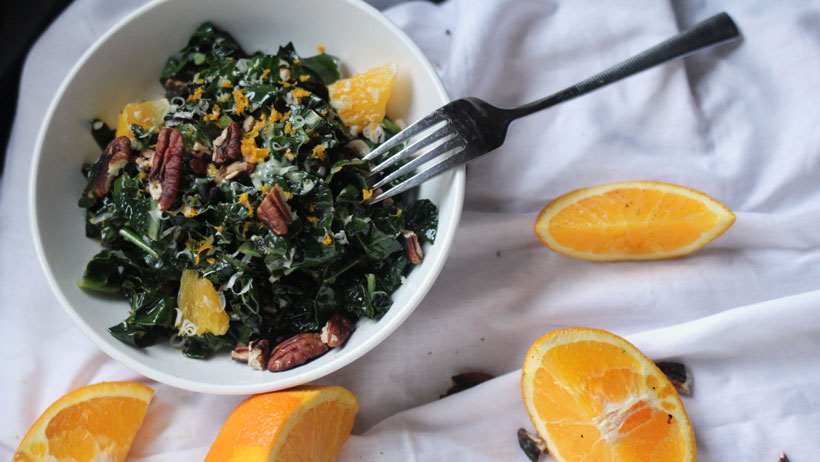
The salad arrived delicately sliced, slightly warm and adorned with garlic chips and orange segments. It was delicious -- tangy, crunchy and just plain good. They all ate their words and ended up ordering another one. Never doubt the food snob -- I know how to order.
The following week I decided to make this salad for my lunches to take to work. Finding Tuscan kale, it turns out, is not as easy as you might think. You could certainly use regular kale for this, but I just love the deep green color in contrast with the bright oranges. It's just gorgeous on a plate. So of course I continued searching and after stopping by at the third grocery store, Whole Foods, I ended up with a gorgeous bouquet of Tuscan kale.
Generally, Tuscan kale is just a bit more fibrous than classic kale, so it is imperative to slice it into thin ribbons after washing and massaging it. Yes, massage it just a bit while washing -- it helps it become a bit less fibrous.
My personal favorite of this recipe is the garlic chips. They are absurdly easy to make, healthy and change the entire flavor profile of the dish.
Little slivers of golden deliciousness are upon us friends, and they are fantastic.
Turns out those fancy restaurant salads aren't nearly as complicated as everyone thinks they are. Trust me, give this salad a try; it is great served fresh as well as the next day. What an awesome way to freshen up those boring salads we are all sick of.
If you need that extra protein bump, add some grilled shrimp or some poached eggs on top.

Warm Tuscan Kale Salad with Garlic Chips, Oranges and Pecans
from Girl and the Kitchen
INGREDIENTS
1 large bunch of Tuscan kale (feel free to sub out regular Kale if you cannot find Tuscan.)
1 large orange
½ cup of pecans, toasted*
5 cloves of garlic sliced super thinly
3-4 tablespoons of freshly shredded Parmesan (the good stuff)
3 tablespoons of olive oil
salt and pepper to taste
INSTRUCTIONS
1. Slice the kale into thin ribbons, only until the stems, and place them into a colander and rinse well. While rinsing them, massage them a bit to get some of the fibrous texture out.
2. Zest half the orange and set zest aside. Cut one of the halves of the orange into segments.*
3. Squeeze out the juice of the other orange and set aside.
4. Add olive oil to a large pan and bring to medium heat.
5. Add garlic slivers into the oil. Cook for about 2-3 minutes or until lightly browned and crispy. Set aside on a plate covered in a paper towel to drain the access oil.
6. Add kale to the same oil that the garlic cooked in. Toss with the oil ensuring it is well covered with the oil and slightly wilted.
7. Add in orange zest, orange juice, salt and pepper. Toss everything together for 1 minute.
8. Place everything into a large bowl toss with pecans.
9. Sprinkle shredded Parmesan on top and extra zest if desired.
NOTES
- Here is a great step-by-step tutorial on how to segment an orange. It is ridiculously simple and super impressive.
- I toasted my pecans over low heat in a regular pan on the stove. You have to toss them around pretty frequently and only toast them for 4-5 minutes until they develop a nice nutty, toasted aroma. Be careful, they burn fast!


.jpg)


.jpg)


